Netgear Extender Setup Guide – Get It Done Easily!
Netgear Extender Setup Guide - Get It Done Easily!
You are about to try and setup your Netgear Nighthawk wireless router with the Netgear WPA supplicant. If you have not done this before, you may find it a little challenging. The reason is there are several important steps involved in the entire process. Some of those steps are explained here for your convenience. Then again, be aware that if you get stuck at any point in the process, the support personnel are there to help. They will always be there to assist you no matter how complicated your setup may be.
Before you can move ahead and configure your Netgear Extender, you first have to finish setting up the default web user interface. You can follow the prompts, or if you prefer to do things yourself, the on-screen instructions will help you through it. Just be sure to follow all the prompts precisely as described as some web browsers behave differently with different settings. In particular, the on-screen instructions of some web browsers such as Internet Explorer will suggest that you change the default web user interface settings to suit your needs. Follow all the prompts carefully and then save all the changes.
After you have followed the on-screen instructions to change the web user interface, the next step is to enter the Netgear Extender web address into your WEP enabled WPA passageway. The WEP Password is usually built into the router; you won’t see it anywhere else on the device. For convenience, you can type the web address into Google or another search engine. To make sure that you typed in the right web address, make sure you look at the white box that appears next to the address bar and not directly at the address itself. If you have not changed anything since you set up the device, the box should be red.
Once you have typed in the Netgear Extender setup web address, click on Save. If you have not yet configured your device yet, you should see a Success message on the screen. If you have already configured the device, a message from the Netgear installer should appear on the screen. Click on Expand, and you will see the wizard of your choice.
At this stage, the advanced setup options will be displayed on the screen. You can select whether to setup an extended wifi range, create a static SSID, change the SSID of your existing wireless network and modify your username and passwords. In addition to these, you will also be able to select how to connect to the internet. Once you click OK, the last step in the process will be completed.
Once you have successfully completed your Netgear Extender setup, you should have connected the device to the internet. The login details for your Netgear Extender should appear on the web page. You can use your standard web browser to log in with either the username “admin” or the default web user interface “user.” By default, the default web user interface is used. You can change the password by clicking on Change Password.
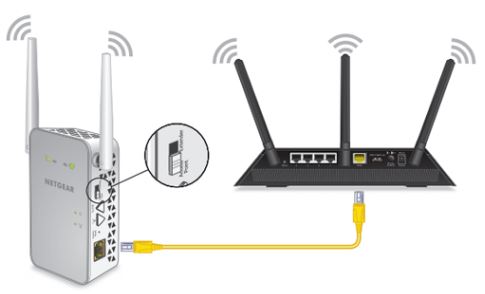
If you are still having some issues, the best way to resolve them is to troubleshoot on your own. One of the first things you need to do if you are faced with network disconnection issues is to disconnect the modem from the Internet. Then, check whether there are any wires left connecting the modem to the Netgear extender. Check whether all the connections on the Netgear extender are working properly or if there are any wires lying around.
Some common technical issue such as communication problems and connection failure are covered in the Netgear wifi extender setup guide. In most cases, the reason why the connection cannot be established is a hardware issue. This is why it is important to contact technical support technicians via chat. Some common questions that need to be answered include installation issues, updating firmware, and compatibility issues. Some users are also concerned about the compatibility of the Netgear wireless router with their specific models.